Thursday, October 14, 2010

hodge:podge Inspired Star Wars Peg Board

As I was browsing through the blogosphere, I came across this great post by hodge:podge.  You can check it out here, tutorial and all! 

Once I saw this Star Wars inspired eye chart wall art, I knew I had to make one.  And I had just the person in mind to make it for.  I can't even begin to count the number of times I have watched the first trilogy (or for you die hard fans out there, Episodes 4-6)...usually because my big brother was watching it (over and over and over again).  Plus, since he just bought a new house and significantly downsized his garage/tool space, he is going to need a new system to organize his tools.

Hence, the Star Wars Eye Chart Tool Organizing Wall Art Peg Board...


Thanks hodge:podge for the great idea!!

Saturday, October 9, 2010

Quite possibly my favorite find of the year...

Sometimes we get it in our minds that we have to have a certain type or specific piece of furniture, and so we set out to find it.

...And sometimes a great piece of furniture just finds you. 

I wasn't even looking for an armoire.  In fact, I didn't even know I wanted one until I saw this...


Isn't it beautiful?


Can you believe it only cost $50?

How could I turn that down?  I guess I am kind of an idiot in this whole ordeal, because there were two of them and I only bought one.  I went back a couple of weeks later with the hopes that maybe...just maybe...it would still be there, but obviously someone else saw the same beauty in this armoire that I saw. So, sadly I only have one.  But, oh how I do love the one I have!! 

As you can see, there are no shelves and only a hanging bar across the top.  I really wanted to use this to replace my dresser, so I was definitely going to need some shelves.  I ran down to Home Depot, bought a full sheet of plywood and had them cut the shelves for me while I was there. (They didn't fit the first time, but luckily they were too big and not too small...so I was able to just take the shelves back to Home Depot and have them trimmed down to the right size.  Maybe someday I will learn to take my time and double check my measurements, but who are we kidding?  If I haven't learned by now, will I ever?) 

But, I digress...

Once I got the shelves cut, I could have just called it a day and loaded all of my clothes on the shelves...but where is the fun in that??

Instead, I decided to cover the shelves with fabric and line the back of the armoire. 


This was pretty easy. All you need is several pieces of fabric larger than your shelves and one large enough to cover the entire back side of the armoire and a staple gun.


I also bought a couple of baskets to hold my delicates.  I couldn't find exactly what I was looking for, so I just bought the cheapest ones and added a little spray paint and new basket liners so they would go with my newly decorated armoire.


I couldn't be happier!!  Like I said, quite possibly my favorite find of the year...

Thursday, September 23, 2010

A Gift for Amelia

A few weeks ago my friend April gave birth to an adorable baby girl named Amelia Liliana!! 


I was so excited when I found out she was having a girl.  Two of my brothers have six kids between them and five of them are boys.  We haven't had a baby girl around here for 12 years.  And I didn't even know how to work a sewing machine when she was born.  The boys have been a lot of fun to craft for, but the older they get...the less interested they are in the gifts I can make for them.  That is until I learn how to build my own Wii or PlayStation or remote control helicopter.

So, of course I was just tickled to get the chance to make baby girl presents!  I definitely went way overboard, but it was a lot of fun.  I started with the moses basket in the picture above.  The bumpers, the ruffle, the ties and the sheet are all made from flannel to give Amelia that extra soft coziness as we get into the cooler months.  I love giving a moses basket as a baby gift...almost as much as Amelia seems to enjoy sleeping in it.  You can get pretty extravagant and creative with how you make the lining and most moms are so appreciative to have this for the first few months.  You never have to leave baby sleeping alone in the room while you are trying to catch up on things.  Plus, the lining is so quick and easy to make!!

Unfortunately, we live a couple thousand miles away from each other, so I wasn't able to make it to the baby shower.  But, I sent a bag filled with all homemade gifts...


The whole group

I always like to make a little something for the siblings, and Amelia's big brother Jacob loves the Care Bears.  So, I made Care Bear Big Brother/Little Sister shirts for the two of them.

I got this great tutorial from Dana's blog Made for the knit dresses and used a Dumbo picture to create my own stencil, like I did here.  A little blue knit to trim the neckline and a pair of blue knit bloomers...what an adorable outfit!! 

Recently, I discovered elastic thread and how to create these adorable looks with it.  And, I love it!!  Plus, I added a pair of bloomers to go with the dress.  My niece is always asking for dresses like these, but the pre-made fabric with the elastic section is so expensive and the choices are so slim.  Now I can make her a dress like this out of any print!! 

One more outfit with the elastic thread...this one is a one piece jumper with snaps in between the leg holes for easy diaper changing access.


And last, but not least, I made a small diaper bag for mom.  When she had Jacob a couple of years ago, I made a large diaper bag.  She wanted something smaller for the little trips.


So, I hope they enjoyed all of it. And maybe if I am lucky (and April is reading this), she will send me pictures of Amelia wearing the outfits. (hint. hint.)

Wednesday, August 4, 2010

Let it Rain!!! The Elephant Umbrella Tutorial


I love it when it rains!  I don't love it when it borders on a monsoon, but a nice steady cool rain that brings a much needed gust of cooler air is always a welcome occasion.  Lately around here it has been either hot, hot, hot with the heat index teetering around 110 degrees or violent severe thunderstorms accompanied by torrential downpours and followed up with city wide flooding.  I don't know whether to walk around in a my teeny weeny yellow polka dot bikini all day (which wouldn't be a pretty site) or start building an ark. 

Instead, I have decided to let mother nature inspire me to create a unique accessory to help shield me from these treacherous times. *sigh* (Was that dramatic enough for ya?)

Hence...The Elephant Umbrella!


This is such a simple project and there are so many ways to personalize it and make it your own.  Add your own images, a favorite saying or a name.  Seriously!  The possibilities are endless!

So, let's get started...

First things first, get all your supplies together.

You will need:

an umbrella
fabric for your designs
heat bond
an iron
the design you want to create, tracing paper, a marker and scissors
(I am a Dr. Seuss fanatic and I love elephants, so I used the elephant from Dr. Seuss's ABC book)


After you have selected your design, trace it onto tracing paper (I used regular notebook paper and it worked just fine).  Then cut the design out.  This will be your template for creating the design on your fabric.


Trace the design on the backside of your fabric.  Use a pen or marker that won't bleed and leave a mark.
Be sure to trace your design in the reverse image of how you want the final design to look.


Trace as many as you will need (I made 8 elephants since there are 8 sections on my umbrella) and then cut them all out.


Don't worry if your fabric is wrinkled.  This will be taken care of in a later step.
Repeat this process on the sheet of heat bond for each piece you have created.  Be sure to trace your design on the correct side of the heat bond.  Read the instructions carefully so you will now which side attaches to your design and which side attaches to the umbrella.

TIP: You could attach the heat bond to the fabric before tracing and cutting out each design.  If you do this step, trace your design a bit larger than you want the final piece to be so you can trace on the front of the fabric and cut inside the lines to ensure no markings are on your design.  I chose to do this the hard way, because I tend to get ahead of myself.  I should really learn to stop and plan out all my steps first before diving right into a project.  But, I digress......

Attach the heat bond to the design following the manufacturers instructions.


Iron each design onto your umbrella.  If you are picky about perfection, you may want to mark each spot before you start ironing.  I tend to just eyeball things, so I (once again) just jumped right in and started ironing.  Make sure all the edges are secure!


Viola!  Now you have your very own unique personal umbrella.

Now, go outside and wait for it to start raining!

Friday, July 30, 2010

Top Quote of the Night

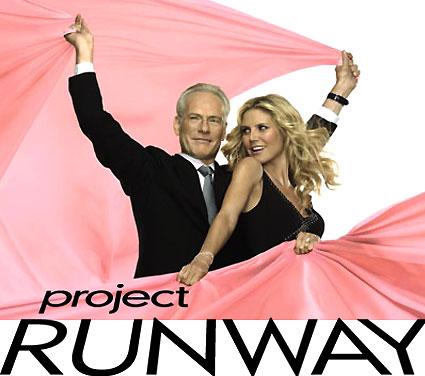
Project Runway Season 8 premiered last night and it was fabulous.  One of my favorite parts of the show is the overly descriptive and imaginative insults that Michael Kors throws at the designers on the runway.  And last night he did not disappoint.


My Favorite:  "She looks like a pole dancer from Dubai." directed at the tragic outfit created by Casanova (#4).


I seriously think Michael Kors needs to teach classes on how to give such creative insults.  I would certainly jump at the chance to learn from the master!

Thursday, July 29, 2010

Make It Work!...Or Give It Up??

It's back!
It's here!
The day has finally arrived!

Project Runway returns tonight!


I am so excited, I can hardly wait for this day to be over and the evening to arrive. 


I am mostly intrigued to know which designer prompts Tim Gunn to stray from his usual "Make It Work" attitude to "Give It Up". 


Also, will it be possible for them to find a designer that will be fiercer than my all time favorite, Christian Siriano?

Friday, July 23, 2010

A Birthday Gift for Molly...Finally!

I am a little embarrased to share this with you, but Molly's birthday was the end of March.  That's right! I said March!  And, sadly, I just gave this gift to her a few weeks ago.  Anyway, I was inspired by these...but not quite patient enough to make them out of plastic.  I tried twice and failed both times.  So, I cheated.  I made them out of waffle weave muslim.  I think they turned out just as cute.  In fact, I had a hard time parting with these.  I almost kept them for myself, but I didn't.


I will definitely be making myself a set of these very soon. 
I love my green bags that I have already made, but these are so cute. 
It's time for new ones.